How to Make Jeans Pant: Step-by-Step Guide
How to Make Jeans Pant

Types of Pant
Pants are generally of two types. For example, basic pants and pilot pants
Basic Pants:
Basic pants can be full or half. Basic pants have two side pockets.
 |
| Different parts of Pant |
Has a back pocket. There is no additional design.
Pilot Pants:
Pilot plants have different designs. The number of pockets usually ranges from 4 to 10.
 |
| Front Part, Back Part, Waist |
 |
| Pocket sim, Back Pocket sim, Pocket Facing |
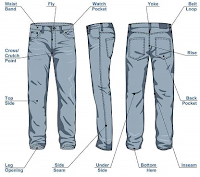
Different Parts of Pants:
1. Front part 2 such as left side or left side and right side or right side.
2. Back part 2 ie left side and right side.
3. West Band
4. Front Pocket SIM
5. Pocket facing
6. Single ply
7. Double-ply
8. loop
9. Back pocket bonds
10. coin pocket
11. Front pocketing
 |
Loop, Back pocket speaker, Front pocketing |
Basic Jeans Pant Front Part Work:
Basic pant functions are as follows:
The front part of basic pants
The front part of basic pants contains a part containing coin pocket, pocket facing, pocket seam, front rise, zipper, single ply, double ply, pocketing, etc.
The inner part of the pocket face is called pocket facing. One side of the pocket facing is joined with the front part.
Pocket SIM
Pocket SIM has to be joined with pocketing. Pocket SIM is under the pocket. The mouth of the pocket is joined to the pocket seam by stitching or tucking two heads. The side joint will be on the opposite side rather than overlocked.
Single ply
Single ply is attached to the front part. Men's pants are on the left side. In the case of girls' pants, it is on the right side. The side that joins the front part will be overlocked on the opposite side.
Double ply
The part that is attached to the pant chain or zipper by stitching is called double ply. The side that joins the zipper will be overlocked.
Front Rise
The part where the left and right sides of the pant are joined together is called the front rise
Coin pocket rolling and joining with pocket SIM
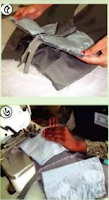
All the parts needed to make the front pocket
 The front part, left side, right side, front pocket facing, pocket seam, and pocketing are required to make the front pocket of the pants. Five thread overlock machines, double needle lock stitch machines, plane machines, and 1/32, 1/4 guides will be needed to do the said work.
 part.
part.
Join the right side with the left side of the front part.

 3. Make a loop by inserting the cutting of the loop into the fabric guide and sewing.
The coin pocket is below the front pocket. Coins have to be pocketed when jointed with Pocket SIM.
Coin pocket rolling
Take cutting fabric. Rolling the coin pocket. Make coin pocket with double needle topstitch. Coin pockets are usually: Double-needle rolling. Then join with Pocket SIM.
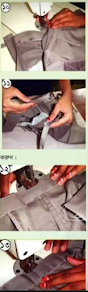
Steps for Coin Pocket Joining with Pocket SIM
1. Place the coin pocket over the pocket SIM.
2. Sew the pocket on a single needle.
3. Overlock on three threads and check the overlock.
4. Similarly, overlock the left side pocket SIM and check it. 5. Now take the cutting part of the pocket facing and overlock it. Check the overlock.
6. Take a single ply and overlock. Check the overlock.
7. Take double-ply and overlock. Check the overlock.
8. Now take the front rise of the front part and overlock it. Check the overlock.
Supporting and Pocket-Facing Joining
The same fabric as the pants will make the pocket-facing. Pocketing is a separate fabric. After the pocketing is joined to the front part the facing is jointed so that the pocketing is visible.
Pocketing joining with pocket sim or pocket supporting
In the case of a pocket seam or pocket supporting, the same rules as the joining of a pocket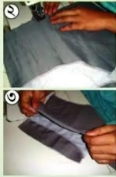
facing with pocket pocketing shall be followed, but the facing shall be at the top of the pocketing and the seam shall be at the bottom.
facing with pocket pocketing shall be followed, but the facing shall be at the top of the pocketing and the seam shall be at the bottom.
Take cutting fabric for pocketing. Get overlocked facing and pocket SIM. Now place it in the pocketing. Join with a single needle stitch. Check the joint.
Then join the pocketing and front facing to the front part. Join pocketing with pocket seams or pocket supporting. Give mouth top stitch of front pocket by double needle machine.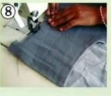
All the parts needed to make the front pocket
The front part, left side, right side, front pocket facing, pocket seam, and pocketing are required to make the front pocket of the pants. Five thread overlock machines, double needle lock stitch machines, plane machines, and 1/32, 1/4 guides will be needed to do the said work.
Pocketing joint with the front part of pants:
Take the front part of the pants. Get pocketing with seams and facings. Keep pocketing as per mark. Join with a single needle stitch. Now turn it over and close the double needle mouth. Check the mouth close. Now stitch the pocket bag.
Tug the pocket up and down. Tug up and down the pocket of the other party in the same manner. Now check the
part.The fabric that is jointed to make the zipper setting is called single-ply. A single-ply joint is to be made with the front rise of the pants. In case of males, the joint should be done on the left or left side of the front part and on the right or right side in the case of females.
The front rise joint in the middle of the front part
The card shape in the middle of the front part is called the front rise.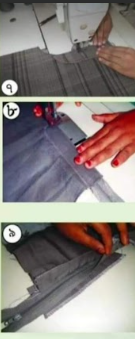
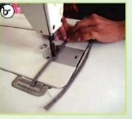
Top stitch with a guide
Sew the single ply of the front part of the pant and the front part together with a 1/16 guide. In some cases only single-ply is stitched.
Zipper joining with single-ply
When making a zipper joint with a single ply, the zipper runner must be placed at the bottom of the joint.
With the zipper and single ply down over the front part, a stitch lengthwise from the waist should end with a little round at the zipper head. This is called the ply round top stitch. It can be single or double.
Below are the zipper joint steps
1. Take the left side part of the front part.
2. Place the overlocked single ply on it according to the mark and topstitch on the single needle.
3. Now fold it upside down and top stitch.
4. Now take the zipper and place it on the single ply.
5. Join the zipper with a double stitch. 6. Now mark the cutting pattern for the 'J' stitch.
7. Put a 'J' stitch on the double needle as per the mark.
8. Now take the double pleat and place it under the zipper.
9. Join the double pleat with the zipper.
Front Rise Joining and Top Stitch Steps
Join the right side with the left side of the front part.
Hi joint
Sew the left and right parts of the front rise of the pants together from the bottom of the front part to the zipper. This seam is called a high joint.
High joint top stitch
Stitch above the hip joint. This is called a high-joint top
Stitch.
After that join the left part with the right part of the front part.
The steps for joining are as follows-
1. Take the right part of the front part.
2. Joint with double ply with zipper.
3. Join the front rise.
4. Double stitch on a single needle.
5. Check the joints of the front part.
Back yoke joint of pants, overlock, single and double top stitch, bab, Pocket rolling, and joints
Back yoke of pants
The upper part of the back part is the back yoke. The pants are without a back yoke. The side seam of the back yoke is narrow and the rise side is wide. The back yoke joins with the back part of the pant. To stitch is always on the back yoke. The back pocket is to be joined under the yoke.
Step of back yoke joint of pants
1. First place the back part under the back yoke and overlock in five threads.
2. Overlock by keeping the side to the side and the rise to 3 rise while making the joint.
3. Put a single double top stitch over the yoke on the double needle.
4. Take the cutting piece of the back part and the two parts of the back yoke.
5. Place the back yoke on the upper part of the back part and joint do
6. Join the other part in the same way.
7. Overlock on three threads.
8. Top stitch on the double needle. Check the joint.
Built-in the back pocket
1. Take the cutting fabric for the pocket and roll the pocket.
2. Put a double stitch on a double needle. 3. Now mark the pocket by keeping the finish pattern.
4. Take the marking pattern for the pocket joint and mark the pattern by placing it under the yoke of the back part.
5. Place two pockets on either side and a single needle as per the mark do the joint
6. Now put a double stitch on a single needle.
7. Joint the other pocket in the same manner and check the joint
Back Rise
Where the left and right sides of the back part are stitched together is called the back rise.
Back Rise Joint Rules
1. Back rise usually starts sewing from the waist side
To be done, but start sewing from the bottom side as well
can go
2. The joint should be done by placing the right side over the left side of thbackrisese or the left side over the right side.
3. When making a backrise joint, the 2 yoke points must match.
4. When doing the back rise joint must be 1 s. Mr. The margin should be stitched.
When back-rise top stitch, start at the waist like a back-rise joint. Top stitch 1/32 and 1/4 on the double needle. 1
Back Raise Joint Steps:
1. Take the left and ride side pocketed parts.
2. Match the back rise according to the mark.
3. Join in the single needle.
4. Check the joint.
5. Now overlock to three threads.
6. Put a double stitch on a double needle.
7. Check the joints.
Side seam assembling and top stitch
Side seam assembling by overlocking the back and front parts in five threads is called side seam assembling.
Side seam assembly procedure
1. First take the back part. Place the top side of the backside upwards.
2. Keethe p's back part and front part equal and join with the single needle.
3. Check the joint.
4. Overlock the side of the three threads keeping the top side of the back part and the top side of the front part in the middle as shown in the picture. (This can also be done on plane machines. In that case, the joint has to be overlocked separately in three threads.)
When overlocking, keep the stitch margin wide, so that the stitch does not fall down when double stitching.
6. Turn the pants inside out.
7. Top stitch the side seam with a double needle. (This is also done with a single needle, but in that case, it needs to be stitched twice.)
8. Check the joint.
care label
Care labels usually include instructions for washing clothes, ironing, etc.
Size labels and loop joints
Size label
Size labels are used to make all production items the correct size. The product is size labeled according to the order. These sizes can be 1, 2, 3, 4, 5 or XS, S, ML, XL, X, XL and other sizes.
loop
A loop is a thin part connected to the main part with two ends like a ribbon to hold a part in place.
Pants loop
Back and front parts for belt use on pants waist usually: 1 cm wide and 2 to two and a half inches (2.5) long (can be smaller) Tape is the pant loop.
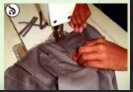
Loop Making Method
1. Take the fabric of the loop according to the size of the pattern and check the inside and outside.
2. Take the loop guide and set the guide on the flatlock machine.
4. Mark the loop made to measure 4 inches and cut it with scissors.
৮
5. Follow Figures 1 and 2.
Loop joint
1. When joining the loop to the pants, make the loop joint with the top side of the loop seam facing the top side of the pants.
2. Generally: Top stitch of loop Top stitch of pants pocket Side top stitch of pants Backrise top stitch Loop joints on this position. (Follow Figure 9)
3. Take the pants with the front and back parts jointed.
4. Mark the places where the loops will be attached using measuring tape and marking with chalk.
5. Join the loops as per mark.
6. Now check the loops.
West Band Joint, West Band Mouth Close, West Band,
Top stitch and loop tuck
Waist Band
The part that is transversely on the waist of the pants is called the waistband. The loop is tucked with the waistband.
1. Prepare the waistband by interlining on the cutting fabric of the waistband.
2. Mark to fit the main level with the west band and fit the level according to the mark.
3. Attach the waistbandband to the pants and give a single needle stitch.
4. Turn both sides of the wristband over and close the mouth with stitches.
5. Now turn the mouth close part on both sides and point it. 6. Now give loop tug and check loop tug.
7. Give the middle stitch. Attach the side level while giving the middle stitch. Check the entire stitch.
8. Now top stitch and join the top of the loops at the same time.
9. Check out the entire West Band.
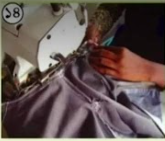
Inseam overlock
Joins the bottom of the back part and the front part of the pant
Inseam is the stitching done by a thread overlock called overlock.
Method of inseam
InSIM is typically: Overlocked on five threads. If donethe on plane machine it has to be overlocked again in three threads. While inseaming, check that the bottom opening (both legs) on the right and left sides are equal.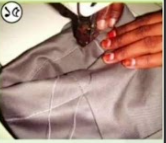
1. Match the front and back sides of the side-seamed pants.
2. Turn the pants inside out for the inseam joint
3. Then join with a single needle stitch.
4. Now overlock to three threads.
★ Inseam should be done matching the points of the back rise and high joint stitches.
Bottom hemming
Bottom means bottom. Hemming is a stitch that is folded or folded. Hemming can be thin or thick.
1. Fold the bottom of the pants.
2. Give a single needle stitch. 3. Check the bottom hemming.
4. Now check the entire pant.
★ While hemming fold the left and right sides equally and start stitching from the inseam side.
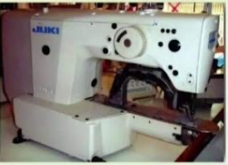
Bartack eyehole and snuff button attached
Bartacking:
There are some areas of the pants that open easily, such as the two ends of the loop, the two ends of the belt, the pleats, the corner of the pocket, etc. Bartek can be small or large. Stitches can be thin and thick. Bartech stitches are difficult to open. That's why the stitching must be tested on another cloth beforehand. Where to bartack the pants should be decided in advance. What type of thread will be given should also be decided first.
Eye hole
Eye holes are usually found in loose pants skirts and jackets. Eye holes are made for fitting snuff buttons. It is a larger-than-normal hole. This hole looks like an eye or an eye and is called an eye hole. Follow the steps below to make an eye hole-
1. Mark the specified place.
2. Test the machine.
3. Select the thread.
4. Make holes with a buttonhole machine in the marked area of the pants.
5. Mark holes for fitting buttons.
Attaching the snuff button
1. Take the button-like size.
2. Set the button on the button stitch machine.
3. Stitch the button according to the mark.
4. Check the button stitch.
The snuff button has different presets. Apply the same amount of pressure to the dieset snuff button.


Comments
Post a Comment